- Bath time: Scrub with washcloth or bath brush, try a variety of soaps and lotions for bathing, play on the wall with shaving cream or bathing foam, rub body with lotion after bath time (deep massage), sprinkle powder onto body and brush or rub into skin.
- Meal preparation or baking: Let your child mix ingredients, especially the thick ones that will really work those muscles. Let child mix and roll dough and push flat. Allow child to help you carry pots and pans, bowls of water or ingredients (with supervision, of course). Let your child tenderize meat with the meat mallet.
- Grocery shopping: Have your child push the heavy cart (as long as the weight is within their capability). Let your child help carry heavy groceries and help put them away.
- Mealtime: Encourage eating of chewy foods and drinking out of a straw. Try having your child sit on an air cushion to allow some movement. A weighted lap blanket may be helpful as well.
- Household chores: Allow the child to help with the vacuuming or moving the furniture. Let the child help carry the laundry basket or the detergent. Let the child help with digging for gardening or landscaping.
- Play time: Reading books in a rocking chair or bean-bag chair may be beneficial. You can help your child make up obstacle courses in the house or yard using crawling, jumping, hopping, skipping, rolling, etc. Listen to soft music. Play the sandwich game (child lies in between two pillows and pretends to be the sandwich, while you provide pressure to the top pillow to the child’s desired amount). Ask them "harder or softer?" as you push on the pillow. Some children will like much more pressure than you would expect. You can also go for a neighborhood walk with a wagon and have your child pull it (make it semi-heavy by loading it with something the child would like to pull around). You can do the same with a baby-doll carriage. Swimming in a pool is a wonderful activity if you have that available, as are horseback riding and bowling. Mini or full-size trampolines are excellent for providing sensory input as well. Make sure the child is using them safely. Sandboxes, or big containers of beans or popcorn kernels can be fun play-boxes. too, if you add small cars, shovels, cups, etc.
- Errands and appointments: Before visiting the dentist or hairdresser try deep massage to the head or scalp (if tolerated), or try having your child wear a weighted hat. Try chewy foods or vibration to the mouth with an electric toothbrush. Let your child wear a heavy backpack (weighted to their liking with books and with the straps padded as needed). Be sure to give the child ample warning before any changes in routine or any unscheduled trips or errands. Many children with SPD need predictability.
Thursday, September 3, 2015
Incorperating Sensory Input into Daily Activities
Sunday, August 23, 2015
Benefits of Early Reading

Begin reading to your child early. Even the youngest babies will gradually come to associate books with the warmth of being held by you and the soothing sound of your voice. By establishing reading time as an enjoyable time, you’re helping to jump-start a lifetime of reading and learning. Numerous studies have identified the many benefits of early literacy development, benefits that last throughout childhood and beyond.
benefits of early literacy development:
- Expanded vocabulary and writing skills
- Healthy social and emotional development
- Longer attention spans, promoting better retention of information in school
- Enhanced imaginative and critical thinking skills
- A sense of closeness and intimacy between parent and child
- Enhanced memory and higher levels of concentration
Monday, August 17, 2015
Avoid the School Morning Frantics!
Here are some tips and tricks to making school mornings less frantic!
1. Wake up before the kids
If your kids are early risers, this may mean that you’re setting your alarm for some ridiculous hour before the sun has even woken up, but it really helps to just have 10 minutes of ‘me time’ before the day begins. Enjoy a cup of coffee, tea or freshly blended juice in your favourite chair. It sets the tone for the day and really assists in helping you to begin your day feeling calm and ready to tackle challenges.2. Prep meals the night before
Plan your week’s menu on Saturday and go shopping for all the necessary ingredients. Then make sure that you prep and pack lunchboxes each evening so that they’re ready to just be taken out of the fridge in the morning. This will significantly reduce the amount of ‘getting ready’ time in the morning, and also ensure that your kids are getting nutritious, well-balanced meals for lunch. .3. Eat breakfast together
It has long been said that “Breakfast is the most important meal of the day”. Teaching your kids this from a young age instills good eating practices that they will carry into their adult life. You need to also be mindful of role modelling this behaviour. Forcing your kids to eat breakfast while you whizz around the house gulping coffee is not very convincing or motivating at all. Eating breakfast together is a way to strengthen your family bond and create a loving, positive mindset before each person embarks on their day. Utilise this time to remind your children of any specific values that they may be struggling with. For example: “So remember, today we’re going to only use our gentle hands with our friends”.4. Laundry
Ensure that each child has 5 complete sets of school clothes where possible. You can then group each day’s clothes together – yes, we mean everything right down to socks and briefs – for each day of the school week. This alleviates the mad panic of running around the house searching for clean shorts or matching socks. It will also help you to plan ahead and be aware of whether a mid-week laundry wash is required for specific items.5. Teach your kids to help
From as young as 4 years old, children are fully capable of dressing themselves, brushing their own teeth (with some supervision) and making their own beds. So don’t make your morning even more pressured by trying to do everything for every family member. This teaches your children responsibility and how to look after their own personal hygiene.6. Have a set routine
Maintaining a time schedule helps each family member to know what happens next. For example, if you wake your children at 06:30, they need to know that they are required to get dressed and make their beds (yes, you too) before they are to be seated at the breakfast table by 07:00. Allow enough time for breakfast so that it is an enjoyable experience rather than feeling rushed and stressed. At 07:30, everyone needs to brush their teeth, and be ready to leave the house at 07:45. While this may seem very regimented, its intended purpose is to equip everybody to feel more prepared and less scattered. Also ensure that your departing time allows for sufficient travel time and unforeseen traffic congestions.7. Avoid the apps
Refrain from indulging in the latest Facebook gossip the minute you open your eyes. It is the fastest way for the precious morning minutes to vanish without recollection. Any social media can wait until your lunch break at work… really, it can. This is also another good role modelling tool; if your kids see you engrossed in your cell phone every morning, while simultaneously yelling at them to hurry up, it really doesn’t teach good family behaviour.Wednesday, August 5, 2015
DONT BE AFRAID OF THE MESS!
 | ||
| While painting together at the easel, Sonia and Ashley keep dipping their brushes into all of the paint containers. After they make a fascinating discovery that the paints have turned a muddy brown, the preschoolers abandon their brushes and begin to make handprints on the easel paper. Then, continuing this messy process, the four-year-olds giggle as they decide to paint-print each other’s faces! Because young children frequently make a mess with art media, you need to think through about how you feel about the mess. For example, did you feel that the girls were developing their cognitive skills as they experimented with color mixing? Did they discover that paint could be applied with a tool other than a brush? Were they learning about the concept of cause and effect? Was this a pleasurable social interaction between friends? Or, were you more apt to feel that they were making a mess because they ruined all of the paints and got paint all over themselves? With careful preparation, a well thought out arrangement of the environment, simple clean-up procedures, and a sense of humor, traditionally messy art activities, such as collage, paint, and clay can be a positive and enjoyable learning experience for everyone involved. Setting-up for Messy Media Organizing tools and materials ahead of time helps children to make choices by being able to see items at glance. If objects are disorganized to begin with, children are inclined to paw through the materials making an even greater mess. Use see-through boxes to hold and separate collage materials. Bring paint bottles to the table in a soda carrier. Provide weighted empty plastic bottles (put sand in the bottom) to securely hold an assortment of paintbrushes. Store clay in a small covered plastic garbage pail that can be easily moved to the art table. Place clay tools in a kitchen utensil caddy or a divided silverware basket from an old dishwasher. Help define limits for the children’s messy projects. Use cafeteria trays, dress boxes lined with foil and clean Styrofoam vegetable and fruit-trays – all with raised edges – to physically contain individual collage, paint, or clay activities. Sections on a table outlined in utility tape help provide boundaries so one child doesn’t spread her mess into another’s territory. Provide materials to cover up the children when it’s appropriate to keep the mess off them. Use old adults’ tee shirts with short sleeves for smocks. For really wet sloppy projects, create waterproof smocks with discarded, sanitized shower curtains or put on spongeable, child-size raincoats purchased at garage sales. Cover your table and floor surfaces, too. Messy newspapers – free for the asking – can be bundled up and thrown away. Shower curtains or inexpensive plastic tablecloths can be sponged off or shaken out by enthusiastic young helpers. Set up areas where individuals or small groups can work together comfortably without crowding. This keeps messy projects from becoming too overwhelming and spinning out of control. Four chairs and four paint trays send a clear message to children about how many participants can be involved in a project. Station a helpful staff member or a volunteer at a really messy activity to make suggestions and redirect “wild” experimenters. Be sure to have enough materials prepared (papers cut to size, glue bottles filled) and available on site. This way, young children can continue to work independently in a place designed especially for the mess, rather than searching the classroom for the needed materials with messy hands. Planning for an Easy Clean-up You need to plan for the clean-up process before messy activities begin or you could be inviting problems. In thinking ahead, for example by covering the table with newspaper, you are helping to facilitate taking care of the mess from the beginning to the end of a project. Your children will enjoy helping with this process if you make cleaning materials easily accessible. On the art table, put out paper towels and wet wipes so the children can remove gushy finger paint and squishy clay from their fingers. A thick cardboard strip can be used as a squeegee to remove excess finger paint from a cafeteria tray. Furnish sponges and spray bottles of water to clean tables, chairs, tools, or the tile floor. In a cooperative venture, your children can use a dustpan, broom, or hand brush to sweep collage scraps and dried clay bits off the floor. If your art area is carpeted, try using a heavy vinyl sheet or shower curtain on top of the rug to catch glue and paint drips. Consider putting the table and chairs inside of a child’s large plastic wading pool to contain really messy clay pieces or spilled paint. Have collection boxes handy to gather up used messy tools – finger-painting combs, splatter paint templates, clay sticks – to be washed later at the sink. Or, provide a small bucket filled with soapy water for soaking off glue and dried on clay particles. However, never soak paintbrushes in warm water as this loosens the glue and the bristles will fall out. Encourage children to wipe off excess glue so the bottles aren’t sticky when they put them away. Use picture labels on open shelves so children can replace collage materials in the right place. Locate an area out of the path of traffic to dry messy activities. A multi-lined clothes rack with clothespins works well to hang drippy paintings. Dry clay projects on wire or wooden racks. Carefully pick up heavy collages and dry them flat on sheets of waxed paper on shelves. Collage When the idea of using collage as an art medium is thought of, the word “mess” may come to mind. To prevent problems, organize and use materials in a planned space. A collage project where you can use a specific space involves the use of shoeboxes and lids. Using different shoeboxes, gather and store like materials. For instance, one shoebox may have straws, while others may have packing squiggles, pieces of lace or ribbons. On the day of the collage activity, have your children select a shoebox. Keep the lid on the shoebox for added suspense to increase the children’s interest. When the shoebox has been selected, the children remove the lid and place the lid’s surface on the table. The inside of the lid then becomes the holder of the project’s materials. As the children remove the collage materials from the shoeboxes, the materials are glued to the inside of the lid. This confines the collage materials to a specific space and prevents a “mess.” Because the children worked hard gathering all the materials at the discovery table, instead of throwing those materials away when they create a mess, use them in a “clean-up” collage. Give the children pieces of posterboard and glue. Have the children glue these “discovery” materials onto the posterboard. When all the materials are affixed, this collage may be displayed and labeled, documenting what learning occurred at the “Discovery Table.” During daily clean-up times, objects are often found that seem to have no specific place. Collect and place those items in a container. Turn those “messy clean up” items into a classroom texture collage project. Using four pieces of posterboard, label each piece with a texture category: hard, soft, rough and smooth. The children can glue those items on the appropriate texture category. Through this collage project, the children classify the “messy clean up” objects and find a place for those items. Paint Paints, whether finger paint, watercolor, or tempera, provide many opportunities for creativity and learning. By arranging paints in a specific manner, painting no longer has to be considered a “messy” project. A splatter paint art activity becomes “do-able” with the use of a shoebox, construction paper, plastic screening, brush (e.g. paintbrush, dog brush), and tempera paint. Line the bottom of a shoebox with construction paper. Have the children select an object (e.g. leaf, pinecone) from a collection of objects on a tray and put that object in the shoebox. Cover the top of the shoebox with plastic screening. For safety reasons, use plastic instead of wire screening. The children then dip a brush into tempera paint and “paint” the screening. This allows the paint to drop through the hole into the shoebox and onto the object and construction paper. When the object is removed, a silhouette of this object will appear, and the paint is confined to the shoebox. Finger painting may be a “messy” activity, but putting a spoonful of this paint on a cafeteria tray confines the paint to a specific area. After the children have created a finger paint design, a print may be made by placing construction paper over the design, pressing it by hand and carefully lifting the paper. Spray bottle art is fun when doing it at an easel. Line the “lip” of the easel with paper towels. Attach pieces of construction paper to the easel and give the children a spray bottle of liquid watercolor. The children can use their fine motor skills to squeeze or press the plunger of the paint bottle handle. As the paint is sprayed on the paper, any drops of paint drip into the easel lip. The paint “mess” is contained to the easel and is easily cleaned up. Clay Teachers often shy away from using natural or earthen clay because they feel it’s too messy or very difficult to care for. However, clay will provide a wonderful tactile experience for your children, quite different from the usual clay alternatives, such as play dough and plasticene. Introduce clay with a “hands-on” experience. Have the children place a manageable grapefruit size ball on a plastic placemat or square of burlap (paper takes the moisture out of clay). Let them roll it, flatten it, pinch it, poke it, and pound it. Talk about how it feels and what’s happening to the shape. When the clay becomes dry, encourage the children to spray their hands with water, never the clay or it will become a slippery mess. Magically, clean up all of the little dried clay crumbs by patting them with a wad of moist clay. Now your children are ready to use some tools and model with the clay. Let them explore making designs on pinched pots with Popsicle sticks, forks or buttons. Stick a handle on the pot with slip – a thin mixture of clay and water – which acts like glue. Accessories are fun to add to clay – put candles on an elegant birthday cake sculpture decorated with plastic flowers. After the children soak and scrub these items to remove any excess clay. Try putting them in a flat, waffle-weave, silverware container placed on paper toweling to drip dry. To help your children investigate the properties of clay try a recycling project. If left exposed to the air over time, the clay hardens. Place it in a plastic bag (to keep the dust down). Two at a time, allow the children to pound it with wooden mallets. After the dried clay is in little chunks, add small amounts of water and knead it into the clay. This project may take several days. When moist and pliable, be sure to keep the revitalized clay in a small, clean, covered, plastic garbage pail. Now it’s ready to use again! A Wonderful “Messy” Project Combine the techniques and materials of collage, clay and paint for a totally “messy” fun frieze. Select a classroom texture collage that was made. Have the children make an impression by turning the collage over and pressing the objects into a clay slab. Carefully remove the clay slab and place it on a cookie or grill rack to dry. This allows the air to circulate around the clay. Put damp paper towels over the clay edges so that it will dry evenly. When the clay impression is thoroughly dry, carefully remove it from the rack with a spatula. It is now ready for your children to use tempera paint to paint highlights on the impression. Conclusion By organizing space and using materials in a confined area, “messy” art projects no longer need to be avoided but can be enthusiastically used. Encouraging the Hesitant Child When a child is reluctant to try messy activities, here are some ways to help her get involved:
Do you hate to see the impulsive child head for the art area? Here’s how to make the situation more manageable for everyone.
Sandra Fisher is an Assistant Professor of Elementary Education and the Coordinator of the Early Learning Center at Kutztown University, Kutztown, PA. She has written Early Childhood Themes: Using Art Masterpieces. |
Friday, July 17, 2015

Monday, June 22, 2015
Summer Sanity Savers
 I’M BORED! The words that every parent dreads to hear. So, let’s change it up by letting GoNoodle save your sanity this summer. When you hear your child say, “I’m bored!” answer with these 5 questions from Kara B., GoNoodling teacher and mom from Cary, NC!
Have you…
B – Brainercized with Mr. Catman?
O – Online or off, checked out Camp GoNoodle activities for movement, creativity, and exploration? (Camp starts June 29!)
R – Regrouped, refocused, and relaxed with Maximo?
E – Exercised for at least 20 minutes with Mega Mixes or Fresh Start Fitness’s Total Motion?
Wednesday, June 10, 2015
DIY Dinosaur Fossils
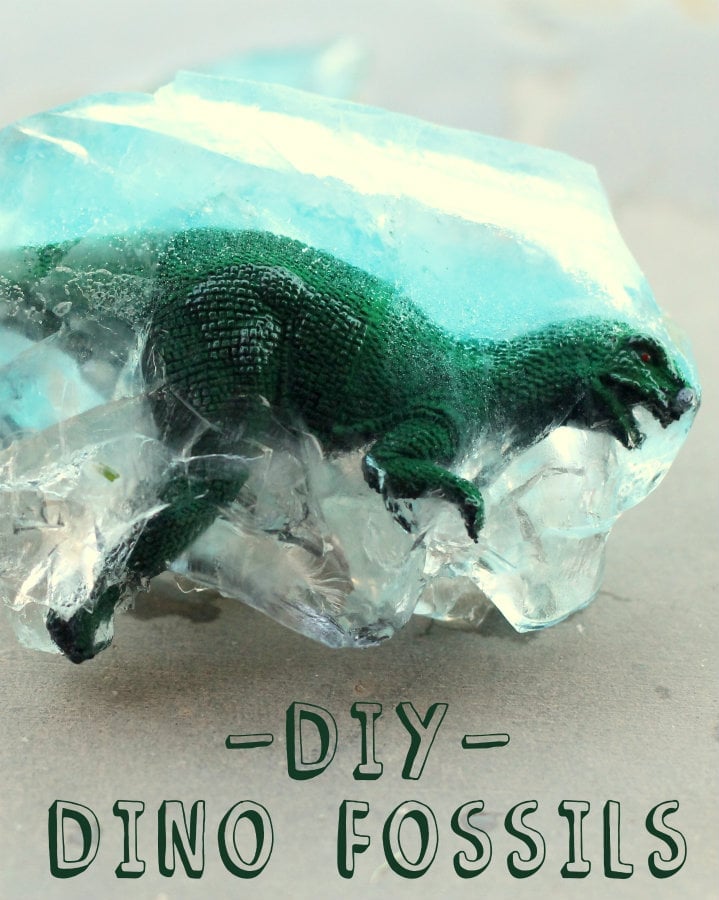
We also made some ice fossils. The kids thought this was BEYOND fun! I got the idea from HERE.
We had everything on hand, so it was a free and very fun project.
SUPPLIES:
– toy dinosaurs
– tupperware
– water
– food coloring (optional)
DIRECTIONS:

1. Fill your tupperware with water half way and add your dinosaurs. Mine floated, but don’t worry about that just yet.
2. Add food coloring.
3. Freeze in the freezer.

4. Take out your tupperware once it is completely froze. I did mine over night.
5. Now add more water to the top so dinosaurs are completely covered.


6. Take out your ice block. I ran my tupperware under hot water for a few seconds to help loosen it up.

7. This is the fun part… crack your ice open. We did this by dropping it on the cement. It was super fun!! LOL!


8. We broke away the rest with a small hammer. We got the rest of the ice off by putting it under hot water.
The kids thought this was the coolest activity because they felt like they were really “digging” out the dinosaurs and un-freezing them. I felt a little Encino Man-ish myself, if I’m going to be honest, but it was FUN!!
by
Wednesday, June 3, 2015

Friday, May 29, 2015
101 fun things to do this summer!
- Bake cookies for ice cream sandwiches.

- Volunteer at a nature center.
- Make a photo journal.
- Have a luau in the backyard.
- Visit the beach and collect shells.
- Make a fort out of cardboard boxes.
- Visit a farmer's market.
- Stage an A to Z scavenger hunt, where you have to find something that starts with every letter. H
- Pick berries.
- Have a picnic at a state park.
- Make ice cream. Tipograph loves using YayLab's ice cream ball, which you fill with ice cream base and kick around until frozen.
- Go canoeing at a local lake.
- Build a sandcastle.
- Write and illustrate your own book and have it published into an actual hardcover book using IlluStory.
- Forget cooking -- set up an ice cream sundae buffet for dinner.
- Clean up trash at a local park.
- Have a backyard campfire...or just use the grill! Roast hot dogs on sticks, pop popcorn and finish off with s'mores.
- Make homemade pizza.
- Go for a walk and then make a collage from nature objects you find along the way.
- Head to a creek and look at the ducks.
- Set up a lemonade stand..
- Have a water balloon fight.
- Practice your origami skills and make objects to hang from the ceiling.
- Go biking on a trail
- Interview an older relative about what life was like when they were young.
- Plan a picnic at a local park -- or in your backyard.
- Print out a list of children's books that have won Caldecott Medallions. Visit the local library throughout the summer and try to read as many as you can.
- Create salad spinner art: Place circles of paper inside a cheap salad spinner, dab tempera paints on top, cover and spin away.
- Practice making interesting shadow puppets and then put on a show with your characters.
- Plant a garden of herbs and veggies.
- Make a sidewalk chalk mural.
- Go ice blocking (sledding) in the grass with a towel-covered block of ice.
- Have an outdoor painting party using huge canvases or cardboard.
- Visit a fish hatchery.
- Plant a butterfly garden with flowers.
- Pretend to be pirates for a day -- dress up in costumes, plan a treasure hunt and talk like a pirate.
- Make an indoor sandbox using colored rice: mix 4 cups of rice with 3 tablespoons of rubbing alcohol and a few drops of food coloring and let dry overnight.
- Turn the backyard into a carnival -- set up a face painting area and games like ring toss.
- Make totem poles out of paper towel rolls and decorate them.
- Visit a museum you've never been to.
- Make a giant hopscotch or Twister game on the lawn (with spray paint) or driveway (with chalk).
- String beads into jewelry.
- Make a bird house out of Popsicle sticks.
- Learn about stargazing and identify as many constellations as possible -- see if there are any local astronomy groups for kids.
- Create leis with wildflowers.
- Go fossil hunting near a lake.
- Break out your baseball gloves and start a game, sandlot style.
- Make paper boats and race them in a kiddie pool using straws to propel them.
- Play mini-golf -- or set up a course in your driveway by laying different size containers on their sides.
- Make your own colored sand and create sand art.
- Get a map of the United States and mark off all the exciting places you want to visit -- create the ultimate road trip.
- Set up a net and play badminton and volleyball.
- Visit an amusement park or water park.
- Wade through a stream and search for minnows or tadpoles.
- Go zip-lining.
- Have a tricycle race at the park.
- Investigate an ethnic grocery store and make lunch using interesting spices and kid-friendly international recipes.
- Visit a fire station.
- Collect rocks and paint them to use as paperweights or pet rocks.
- Go roller skating.
- Visit a zoo or aquarium to learn about animals.
- Run through the sprinklers.
- Blend your own smoothie.
- Set up a bike wash and raise money for a local charity.
- Batter up at a batting cage.
- Let kids paint the sidewalk or patio with plain old water and sponge brushes. When their creation dries, they can begin again.
- Bake cupcakes in ice cream cones and then decorate them.
- Assemble a family cookbook with all your favorite recipes.
- Go horseback riding.
- Make popsicles in Dixie cups using fruit juices.
- Catch fireflies in a jar (and let them go at the end of the night).
- Stage your own Summer Olympics with races, hurdles and relays.
- Create a backyard circus -- kids can pretend to be animals and dress up as clowns.
- Decorate bikes and have a neighborhood Fourth of July parade.
- Take a sewing/crochet/knitting class.
- Make Mexican paper flowers using different colored tissue paper.
- Go to a flea market.
- Volunteer at an animal adoption organization.
- Visit a retirement home and read stories to residents.
- Attend an outdoor festival or concert.
- Pick a nearby town to visit for the day.
- Visit a cave.
- Get a map of your area, mark off all the local parks -- then visit them, take pictures and vote for your favorite.
- Take in a fireworks exhibit.
- Make crafts with recyclable items like stickers using old photos, magazines and repositionable glue.
- Make your own hard-to-pop bubbles with 1 cup of distilled water, 2 tablespoons of Dawn dish soap and 1 tablespoon of glycerin.
- Paint canvas sneakers with fabric paint pens or acrylic paint.
- Create three dimensional buildings using toothpicks and mini marshmallows.
- Make bird feeders by covering pine cones with peanut butter and rolling in birdseed.
- Paint with ice by freezing ice cube trays with washable tempera paint.
- Create unusual s'mores by experimenting with ingredients like cookies, bananas, flavored marshmallows and white chocolate.
- Have a fancy tea party.
- Make a giant slip-n-slide with a painter's tarp and shaving cream.
- Go camping in the backyard or at a campsite.
- Let kids paint each other with washable tempera paint, then wash it off in the sprinklers.
- Visit a national park and help the kids earn a junior ranger badge.
- Go to a ballgame and teach your kids (and yourself!) how to keep a scorecard.
- Set up a tent in the backyard to use as a summer playhouse.
- Take a free kid's workshop at stores like Lowe's, Home Depot or Pottery Barn.
- Have a game night with charades, Pictionary and bingo.
- Take a boring brown paper bag and have kids brainstorm creative things to do with it -- you'll be surprised at how many things you can come up with.
Monday, April 20, 2015
Homemade Bubbles
About
Remember how much fun you had with bubbles? Well, your child will love them just as much as you did! From blowing to popping and chasing, bubbles offer a great way to get some physical activity - and bragging rights to whoever blows the biggest one!How To
What You’ll Need:- 12 cups water
- 1 cup dish soap
- 1 cup cornstarch
- 2 tbsp baking powder
- Bubble wands, wire coat hangers, paper towel tube, plastic rings
Mix ingredients together in order in a clean pail. Stir occasionally in a gentle pattern so there isn't too much foam. Take away any foam as it forms. Add another cup of water when the pail is half empty.
If you don't have any bubble wands, use a paper towel tube and plastic rings, or bend a coat hanger into a loop. Store extra solution in a tightly sealed container. Solution that has been sitting for a few days makes the biggest bubbles!
Benefits
This Activity Helps Your Child’s Brain Develop:- Fine Motor Skills
- Gross Motor Skills
Monday, April 13, 2015
Why Early Childhood Matters!
Why Early Childhood Matters to... K-12 SCHOOL ADMINISTRATORS
 Q&A with Dr. Denton Santarelli
The current Arizona Superintendent of the Year, Dr. Denton Santarelli has served the Peoria Unified School District for more than 34 years, beginning as a teacher and serving most currently as superintendent. Well-known for his contributions to school improvement, Dr. Santarelli has been an on going advocate for public education by promoting an environment conducive to the social, emotional, physical and academic growth of all students.
In addition to being named the 2014 Arizona Superintendent of the Year by the American Association of School Administrators (AASA), Dr. Santarelli has also been honored with the 2013 Arizona School Administrators’ (ASA) Raymond Sterling Kellis Leadership Award, 2012 Superintendent of the Year for Large Districts in Arizona, and the 2012 AdvancED Superintendent of the Year Award.
Why is school readiness so important to later student success in grades K-12?
We know from research that most brain development takes place from birth to age 5, making early education critically important to set the stage for future success. The social and personal experiences that children receive from early childhood specialists in a preschool program provide a solid foundation for later academic excellence.
Over your years in the education field, do you think K-12 school leaders are more readily recognizing the importance of early childhood?
Absolutely. Many school leaders see that those students who come into their K-12 system with the foundation from early childhood education are better prepared and need less remediation. Students who have benefited from early education are also on target and outperform their peers who may not have participated in school readiness programs. Peoria Unified’s Community Preschools work to provide best practice strategies and in partnership with our special education department can identify developmental delays early to provide the appropriate interventions.
Do you believe that the early experiences that children have at home are as important as early experiences in traditional educational settings, such as in preschool?
We know that parents are their child’s first teacher, but the experiences that children have at home and the experiences they have in preschool go hand-in-hand. A solid preschool program helps to accentuate what takes place in the home. It is extremely important that all children have access to reading materials at home and a caring parent or adult to help serve as their first teacher. Likewise, it is vital that students are given access to early childhood programs where they learn from a qualified teacher alongside other children.
How can families promote quality interactions that will prepare their children for kindergarten?
The most important step you can take to set your child up for success is to read to them. Also, do not use slang words, but use real words as you have conversations with them to help their verbal development. Include your child in activities around the house, especially those that have step-by-step instructions, such as cooking or baking. When you ask them a question, have them explain their answer rather than provide you with a one-word response.
As superintendent of one of the largest districts in Arizona, how has your district been able to partner with First Things First?
We have had a long-standing partnership with First Things First and have appreciated their support for our more than 1,000 preschool students. The new Family Resource Center at Sky View Elementary has been a wonderful addition to our district, providing resources to families that need early childhood classes, tools and support. It is our hope that this program will increase awareness in our community of the importance of pre-K learning to the long-term development and success of all students. In addition, our partnership has extended through our Career and Technical Education programs to our Child Oriented Occupational Programs (COOP), where First Things First has been able to provide resources for the student-teachers that participate in the program.
Thursday, April 9, 2015
65+ Awesome Apps for Autism

But the immense variety of apps can overwhelm us all. How do you narrow down the number and figure out which ones work best?
Monday, March 30, 2015
5 Lines of Tape

Love this website and all the great ideals to do with your little ones! Check out all the fun and learning you can have with 5 lines of tape!
Wednesday, March 11, 2015
Reading Aloud at Home
Tuesday, March 10, 2015
Put down the flash cards and play!

Love this article on building STEM skills in our young kiddos. People tend to forget the power of play. Children are forming and testing theories while they play all the time! http://bit.ly/1GpR36j
Thursday, March 5, 2015
Food Sensitivity

I have been doing a lot of investigating into food sensitivity and how it can effect us in many ways, especially our children with behavioral difficulties. Below is a great article looking at the link between infants gut bacteria and the future development of allergies and asthma. It's a good read!
Tuesday, February 24, 2015
Love of Reading Month
Monday, February 23, 2015
Monday, January 26, 2015
Special Needs Family Participation

I can across this company offering amazing therapy equipment (that is also very cute) to help children take part in family activities. You have to check out this site if you are a therapist or have a child with physical delays.
Monday, January 5, 2015
Pepper Snowflakes

Materials:
- Any color bell pepper or pepper's if you want different snowflakes!
- White Paint
- Construction Paper
- Cut pepper in half. Talk about what the pepper looks like inside, look at the seeds, and ask questions about the pepper. If using Two different peppers, talk about the difference between the two. See if your little one will taste the bell pepper!
- Dip in paint and make fun snowflakes!
Subscribe to:
Comments (Atom)